The Water Damage Restoration Process, Step by Step
Water damage restoration is the work of stopping a water loss, removing the water, drying the structure to verified readings, and rebuilding what can't be saved. Here's the full process as SummitFrame Restore runs it on a Dallas home — five stages, what each one involves, and how long the whole thing realistically takes.
Restoration vs. Mitigation — What the Term Actually Covers
People use "restoration" to mean two different things, and the difference shows up on your invoice. Mitigation is the emergency half: stopping the source, extracting standing water, and drying the structure so the damage stops spreading. Restoration is the rebuild half: replacing the drywall, flooring, and paint that the water ruined, so the home goes back to how it looked before the loss.
Most "water damage restoration" jobs are really both, run back to back. A pipe bursts; we mitigate first to halt the damage and get the structure dry, then restore the materials that didn't survive. The five steps below walk through that full arc, mitigation through rebuild.
The StepsThe 5-Step Water Damage Restoration Process
Every job follows the same sequence. The IICRC S500 — the industry standard for water damage restoration — defines the order, and skipping a step is how a home ends up with hidden moisture and mold weeks later.
Inspection & Moisture Assessment
We map the water, classify it, and set drying targets before anything is touched.
Water Removal & Extraction
Pumps and truck-mounted extractors pull standing water out the same day.
Structural Drying
Air movers and dehumidifiers dry the structure to verified moisture readings.
Cleaning, Sanitizing & Mold Control
HEPA filtration and antimicrobial treatment on anything the water contacted.
Restoration & Rebuild
Drywall, flooring, and paint go back, returning the home to pre-loss condition.
Inspection & Moisture Assessment
The first crew on site doesn't start ripping out drywall — they read the water first. Water travels under flooring and up inside walls where you can't see it, so we use moisture meters and infrared thermal cameras to trace exactly how far it spread. What we find sets the whole drying plan.
Two classifications drive every decision from here:
- Water category (1, 2, or 3). Category 1 is clean water from a supply line. Category 2 ("gray water") carries some contamination — a dishwasher or washing-machine discharge. Category 3 ("black water") is grossly contaminated: sewage backup or ground-surface water, which means added protocols and more aggressive removal of porous materials.
- Class of loss (1 through 4). This grades how much material is wet and how hard it will be to dry — from a small spill on a hard floor (Class 1) up to deeply saturated, low-evaporation materials like hardwood and plaster (Class 4). The class tells us how much drying equipment the room actually needs.
We log baseline moisture readings on every wet surface at this stage. Those numbers are the finish line we dry back to later — and the documentation an insurance adjuster will want to see.
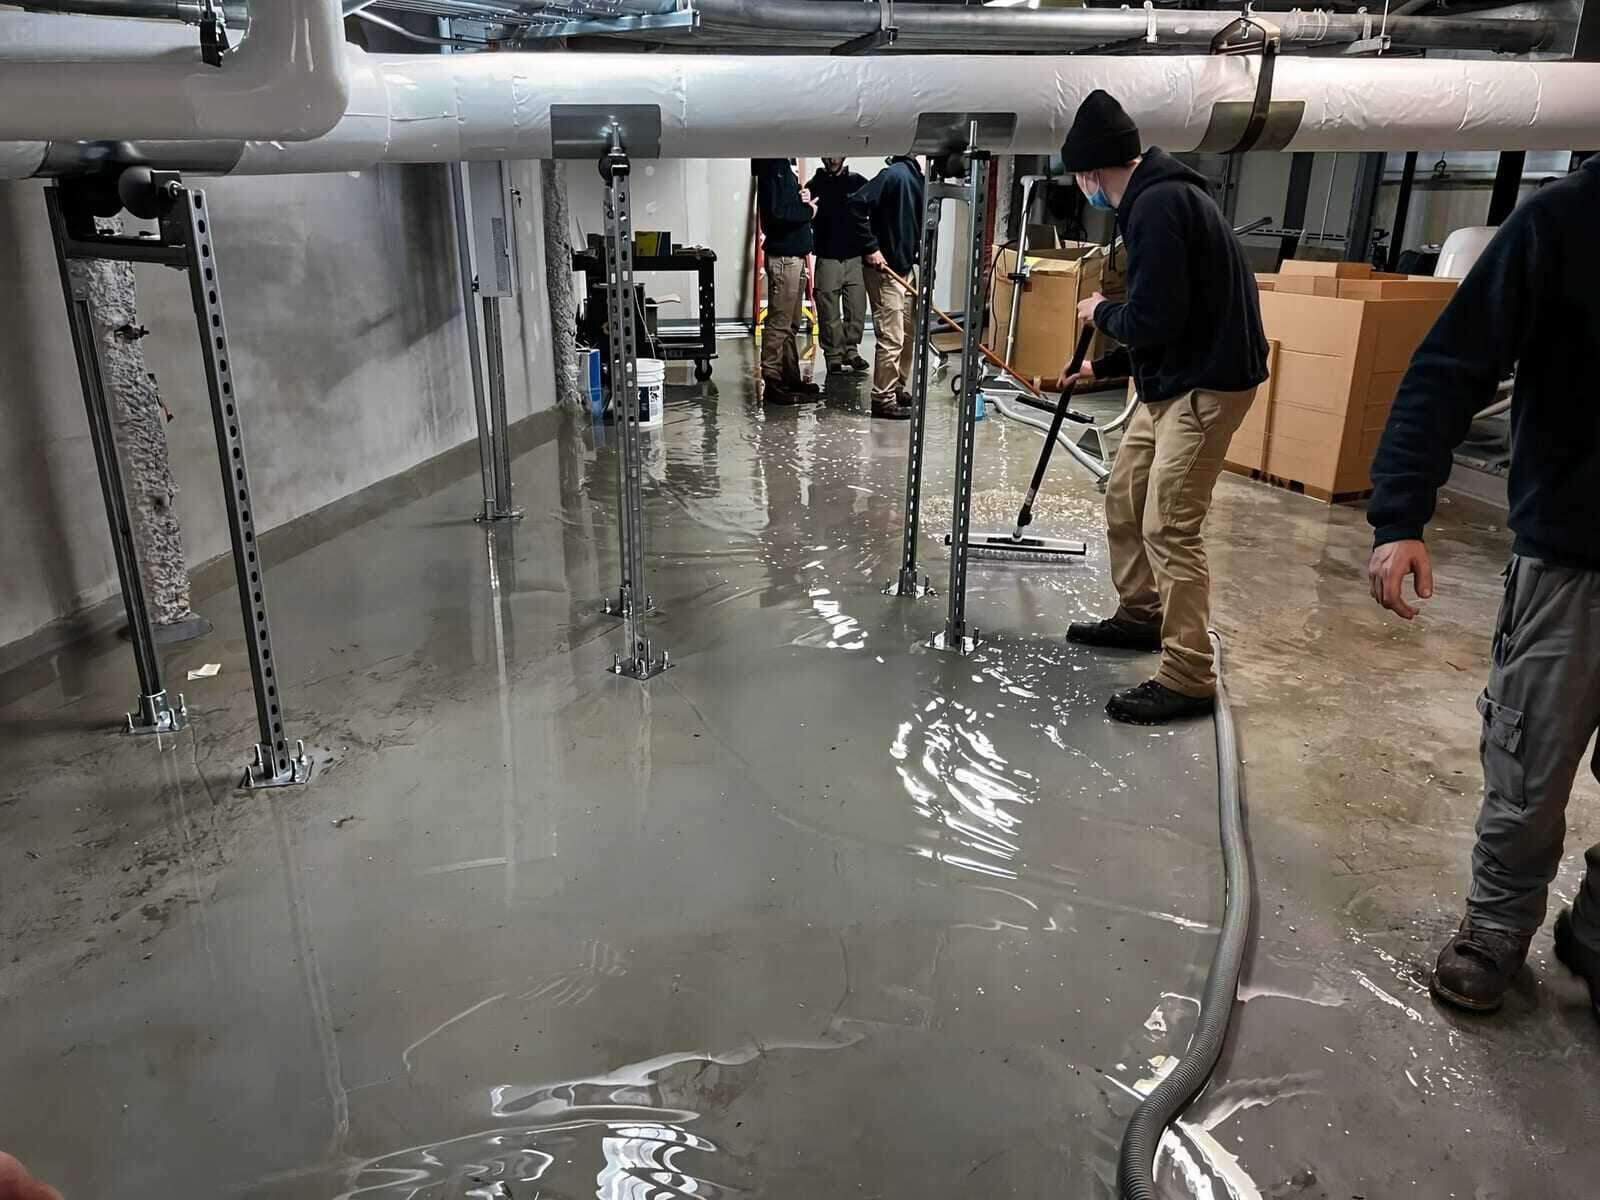
Step 2Water Removal & Extraction
Standing water comes out first and fast, because every hour it sits, it wicks further into the structure. For deep water — a flooded basement or a slab leak that's pooled — we use submersible pumps. For the rest, truck-mounted and portable extractors pull water out of carpet, pad, and hard flooring far faster than any wet-vac.
The goal here is volume: get the bulk water gone so the structure can actually begin to dry. Thorough extraction is what shortens the drying stage that follows — the more water we pull mechanically now, the less the dehumidifiers have to pull out of the air later. See our water removal & extraction page for how that side of the job works in detail.
Step 3Structural Drying
This is the step most people underestimate, and the one that protects the home long-term. Extraction removes the water you can see; drying removes the moisture soaked into the wood, drywall, and concrete that you can't. We place high-velocity air movers to lift moisture off surfaces and commercial dehumidifiers to pull that moisture out of the air, controlling the room's temperature and humidity the way the S500 standard lays out.
Here's the part that matters: "dry to the touch" is not dry. A wall can feel dry on the surface while the cavity behind it is still saturated — and that's exactly where mold starts. We dry to verified moisture readings, taking daily meter readings on every wet material until each one returns to its documented baseline. The equipment stays until the numbers say the structure is dry, not until the floor feels okay underfoot. Our structural drying page covers the psychrometry behind it.
Step 4Cleaning, Sanitizing & Mold Control
Water leaves more than moisture behind — it leaves whatever it carried. Once the structure is dry, we clean and sanitize everything the water contacted. Category 2 and 3 losses get an antimicrobial treatment to kill bacteria and stop microbial growth; we run HEPA air scrubbers to capture airborne spores and particulates during the work.
If drying was delayed or the loss sat over a weekend before anyone called, mold may already have started — it can take hold within 24 to 48 hours of water exposure. When we find it, we set up containment to keep spores from spreading to dry parts of the house, then remove the affected material. For an active mold problem, see mold removal & remediation.
Step 5Restoration & Rebuild
The last step puts the home back together. Anything the water ruined beyond saving — soaked drywall, swollen baseboard, delaminated flooring, stained paint — gets replaced and finished. Restoration can be minor (a few feet of baseboard and a coat of paint) or a full rebuild of a room, depending on how much had to come out during mitigation.
The standard we work to is "pre-loss condition": the room should look the way it did before the water hit, with matched materials and finishes. Because we handle both the drying and the rebuild, there's no gap where you're left coordinating a second contractor while your home sits half-finished.
The TimelineHow Long Does Water Damage Restoration Take?
For a typical residential water loss, expect three to five days of drying, with rebuild on top of that. Here's how the stages usually break down:
- Inspection & extraction: same day. We arrive, assess, and pull the standing water on the first visit.
- Structural drying: 3 to 5 days for most homes. Equipment runs continuously and we monitor it daily until materials hit their target readings.
- Cleaning & sanitizing: folded into the drying window, or a short pass after, depending on the water category.
- Restoration & rebuild: varies widely — from a day of drywall and paint to a couple of weeks for a full room, and longer if it routes through an insurance claim.
What pushes a drying job past five days: a Category 3 loss, deeply saturated hardwood or plaster (a Class 4 loss), water that sat for days before anyone called, or the muggy stretch of a North Texas summer, when high outdoor humidity makes the dehumidifiers work harder. The honest answer is that the structure tells us when it's done — we dry to the readings, however long that takes, rather than pulling equipment on a schedule.
Good to KnowFrequently Asked Questions
How long does water damage restoration take?
Extraction happens the same day we arrive. Structural drying runs 3 to 5 days for most homes, monitored daily until every wet material returns to its baseline moisture reading. Rebuild is on top of that and varies — a day for minor drywall and paint, up to a couple of weeks for a full room. A Category 3 loss, saturated hardwood, or a long delay before the call all extend the timeline.
What's the difference between water mitigation and restoration?
Mitigation is the emergency work that stops the damage from spreading — shutting off the source, extracting standing water, and drying the structure. Restoration is the rebuild that follows: replacing the drywall, flooring, and paint the water ruined so the home returns to pre-loss condition. Most jobs are both, run back to back. We handle the full sequence.
How do you know when the structure is actually dry?
By the meter, not by feel. At inspection we log a baseline moisture reading on every wet material, then take daily readings through drying. The structure is dry when each material returns to its documented baseline — which is often well after a surface "feels dry to the touch." Drying to verified readings is what prevents hidden moisture and the mold that follows.
Do you handle the rebuild too, or just the drying?
Both. We run the mitigation — extraction, drying, sanitizing — and the restoration rebuild, from drywall and flooring to paint. Keeping it under one crew means there's no gap where you're hunting for a second contractor while your home sits half-finished, and the documentation stays consistent for your insurance claim.
Water Damage in Your Dallas Home? Start the Process Now.
Every hour standing water sits, it spreads further into the structure. Call SummitFrame Restore and we'll start at step one — assess, extract, and dry to verified readings. Reach a real person any time, 24/7 Emergency Response.
Call Now: (469) 895-7900